- Select Manage Plates > Create CRC Plate.
- Sample Source: There are two ways to provide a list of samples to be cherrypicked for a CRC assay. Either upload a file or paste in a list that contains the list of samples to be cherrypicked.
- Sample Screen: Selecting a screen for the uploaded retest samples helps filter down the lots that have been tested in the selected screen. If no screen is selected, RxPlora will list all the libraries and sets that contain the uploaded samples.
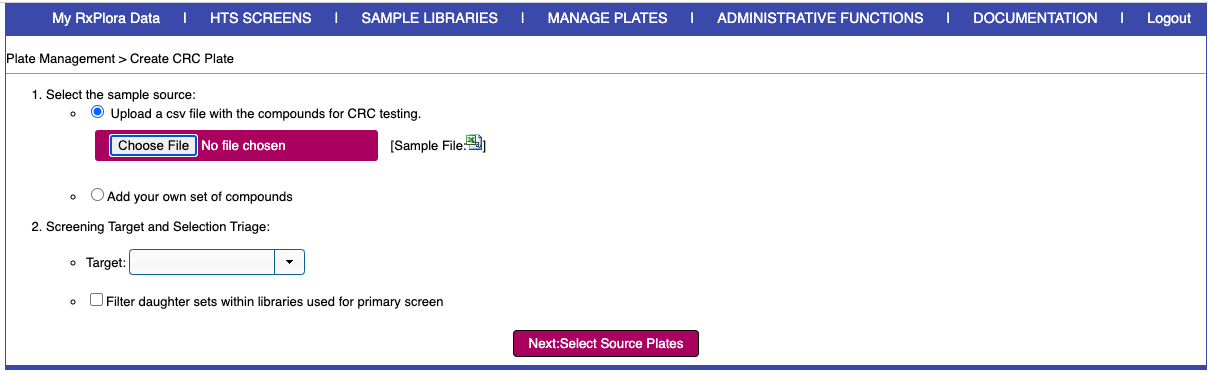
- Click the ‘Next: Select Source Plates’ button. This brings you to the source library selection (if applicable) and plate definition page. Select the appropriate source library and enter the replication details:
- Assay Barcode: Next available PlateID/Barcode for the CRC plate.
- Initial Concentration: The highest concentration from which the dilution should start.
- Final Assay Well Volume: Volume of sample in each well after dilution.
- Fold Dilution: Dilution ratio from one well to the next starting at the highest concentration.
- Spot Cherrypick: Select Yes to pipette from the source plate well directly into the assay plate well. Select No to cherrypick from the source plate into the assay plate well with the highest concentration. RxPlora will compute the transfer volume based on the dilution volume you specify if you choose not to spot cherrypick.
- Type of Assay Plate: Select between 96 or 384 well.
- Type of Dilution: Select the direction of dilution – vertical or horizontal across the plate.
- Plate Division: This option would subdivide the assay plate into the number of parts that are selected. Selecting more parts would result in more samples, but less number of concentration points and vice-versa. Selecting fewer parts for plate division results in fewer samples per plate with more concentration points.
- Number of replicates: Select the number times each sample needs to be replicated.
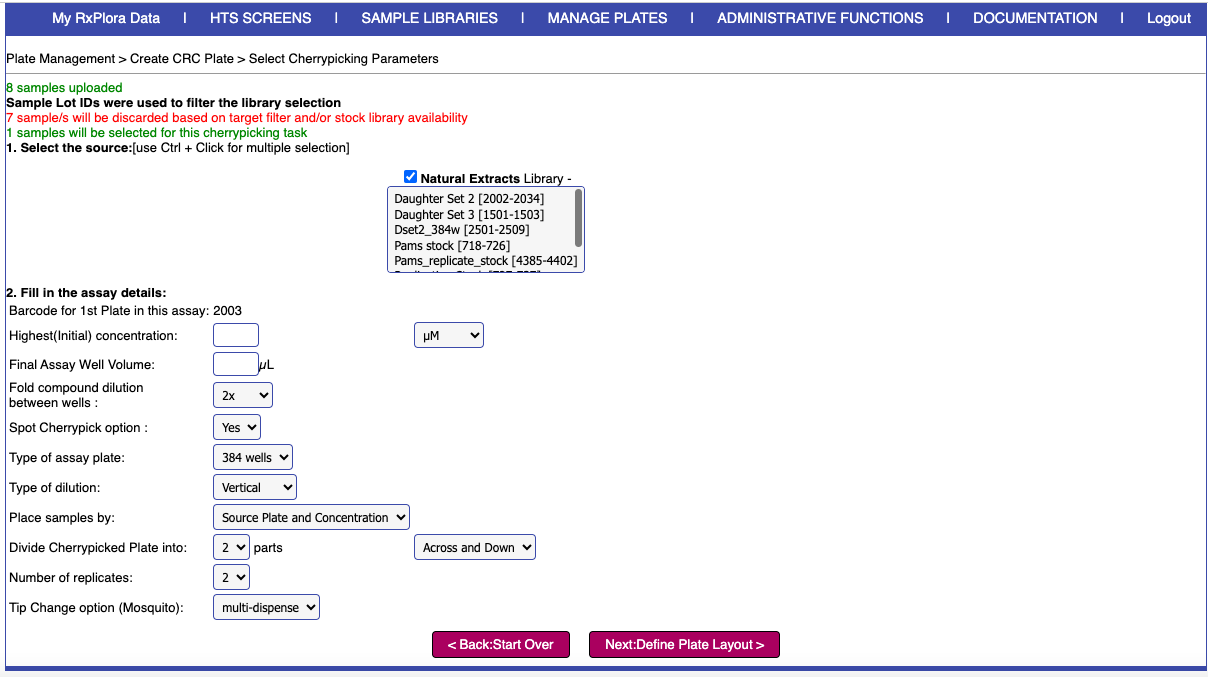
- Click the ‘Next: Select Control Wells’ button. This brings you to the plate layout page where you can block the wells that will contain blanks or controls during the assay run. Click the ‘Next: Preview Plates’ button.
- RxPlora generates a plate map of the CRC plates. If the preview looks okay, click the ‘Final: Cherrypick Compounds’ button.


